

TV Tuga is one among the best and most popular live TV add-on that allows the users to watch entire live TV channels from across the globe at free of cost. This add-on has a main TV section along with numerous subsections to enjoy watching various TV channels from countries such as the US, UK, France, Spain, Britain, and many more.
Most of the free IPTV Kodi add-ons might be available only for some time and it will be automatically blocked due to geo-restrictions. Hence, it is advisable to utilize the service before it went down and then you can opt for another one. The viewers have to ensure that both SportsDevil and F4M Tester add-ons are already installed on their Kodi application.
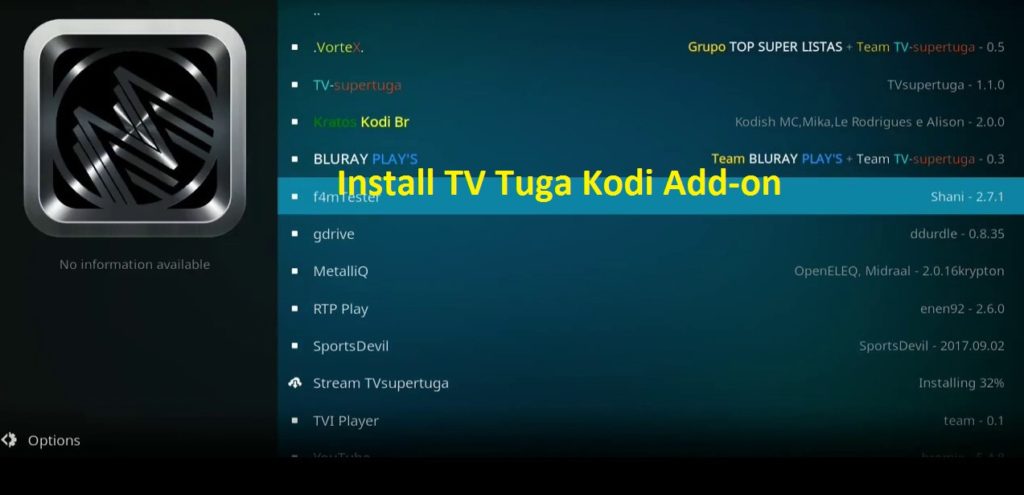
How to install TV Tuga Kodi Add-on on your Kodi Application Krypton version v17
You can follow the below-provided instructions on how to install the Tuga TV Kodi add-on on your Kodi application Krypton version v17:
Stage 1
- Launch the home screen on your Kodi application and navigate to the Add-ons section.
- Access the Settings section that is located near the top left-hand side screen corner.
- Press the Add-ons option.
- Scroll down the existing page and turn on the Unknown Sources on the Kodi application.
- A pop-up notification will appear and prompt to grant permission to install the third-party add-ons by pressing the Yes button.
- Return to the Kodi application’s home screen by pressing the Escape Key or back arrow on your keyboard.
- Choose the Settings option that is located near the top left-hand side screen corner.
- Access the Add Source option from the File Manager sub-menu.
- From the drop-down menu, choose the None option.
- Now, input the web URL and press the Done button.
- You can get the working web URL from any one of the trustworthy websites.
- Then enter your preferred name for the media source file (for e.g Tuga TV) and press the Ok button.
Stage 2
- Return to the Kodi application’s home screen by pressing the Escape Key or back arrow on your keyboard.
- Access the Add-ons section.
- Choose the Add-on browser icon that is located near the top left-hand side screen corner.
- You can process the installation with the help of zip file.
- From the available list, choose the media source file named Tuga TV.
- Select the appropriate zip plug-in file.
- Wait for some time to enable the add-on.
Now, the TV Tuga add-on is successfully installed and you can access the Kodi add-on from the home screen of your Kodi application.
How to install TV Tuga Kodi Add-on on your Kodi Application Jarvis version v16
You can follow the below-provided instructions on how to install the TV Tuga add-on 2020 on your Kodi application Jarvis version v16:
- Access the application on your Kodi box as normal.
- From the home screen accessing the System settings and navigate to the File Manager sub-menu.
- Choose the Add Source option.
- From the list, select the None option.
- Within the provided textbox, enter the web URL and press the Done icon.
- Beneath input the media source file name as per your request (for example Tuga TV) and press the Ok button.
- Return to the home screen of your Kodi application.
- Choose the Add-ons section from the System settings.
- Select the Zip file format to proceed with the installation process.
- Then choose the media source file (Tuga TV) which you had created earlier.
- Select the appropriate zip plug-in file.
- Wait for some time to enable the add-on.
Now, the TV Tuga Kodi add-on is successfully installed on your Kodi application and the same can be accessed from the Add-ons section. Please note that this Kodi add-on is not an official one and belongs to a 3rd party Kodi add-on.
Kodi – Live Streaming Error
Follow the below-provided troubleshooting steps to fix the Kodi application live streaming error via Tuga TV add-on:
- Launch the Kodi application’s main screen.
- Access the My Add-ons section under the Add-ons sub-category.
- Choose the option named VideoPlayer InputStream.
- From the available list, select the InputStream Adaptive.
- Turn on the option by pressing the Enable icon.
- Again choose the RTMP Input settings and turn on the option.
- Ensure that both settings are enabled and press the Done icon.
By following the above steps, you can resolve the live streaming issues on your Kodi application.
Kodi Error – Failed to Install a Dependency
The most common error that each Kodi user experience while utilizing or installing Kodi add-ons are referred to as “Failed to Install a Dependency” error. However, you can follow any one of the below-provided troubleshooting steps to resolve this error message. Based on the error message, you can follow the possible solutions to fix this issue. They are
- Manually install the Dependencies.
- Kodi’s Database can be rebuilt.
- Clear the Kodi application’s cache files.
Let us discuss the troubleshooting steps in detail.
Manually install the Dependencies
You can easily resolve this error message by manually installing the basic required Kodi dependencies. To do so, follow the below steps:
- Open the home screen of your Kodi application and access the Settings icon.
- Choose the File Manager section.
- Double-tap the Add Source option.
- Within the pop-up window, select the None option.
- Input the Fusion TV add-ons web URL and press the Ok icon.
- Then, enter the media source file name as Kodi Add-ons and press the Done button.
- Return to the Kodi applications’ main screen by pressing the Escape or back arrow key.
- From the main menu, choose the Add-ons section.
- You can click on the icon which is named as Open Package to access.
- The installation can be processed from the Zip file.
- Access the currently added media source file and choose the Kodi Add-ons.
- Open the folder named Kodi Scripts.
- Install all the Zip files that are located within the folder one by one.
- These are the most important dependencies that need to be installed.
- Ensure that all the dependencies within the Kodi Scripts folder are manually installed.
After manually installing all the essential dependencies, you can resolve the issue on your Kodi application.
Kodi’s Database can be rebuilt
Another possible solution to resolve the Failed to Install a Dependency error message is by rebuilding the Kodi application’s database file. It is most important to note that rebuilding the database will delete the entire pre-installed add-ons on your Kodi application. This troubleshooting method will be much helpful for the new Kodi users to give a try.
- Initially, you need to access the Kodi application using the Administrator privileges.
- After launching the application, navigate to the Settings icon that is located near the top left-hand side screen corner.
- Access the File Manager sub-menu and choose the Profile Directory icon.
- Within the existing page, open up the folder named Database.
- Right-click on the Addon27.db file and press the Delete button.
- Confirm the same by pressing the Ok icon.
- Then, close your Kodi application and wait for some time and once again access the Kodi application.
- Now, you can give a try to install the same Add-on on your Kodi application and check if the issue persists.
This method will assist the Kodi users to try re-installing their add-on on the Kodi application.
Clear the Kodi application’s cache files
You can follow the below-provided troubleshooting steps on how to clear the cache files on your Kodi application on different devices or platforms:
Android Boxes – Access the Settings on your Android devices and navigate to the Apps menu. Choose the Kodi application and press the Clear Cache button. On the existing pop-up window, press Ok icon to clear all the cache files.
Nvidia Shield TV – We all know that it is much easier to install the Kodi application on your Nvidia Shield devices. You can follow similar steps to clear the cache files like Android devices. Choose Apps from the Settings menu and choose the Kodi application and again press the Clear cache button. That’s it.
Amazon Firestick or Fire TV – The cache files on your Amazon Fire devices can be cleared by accessing the Applications under the Settings menu. Under Manage Installed Application, navigate to Kodi Add-ons and press the Clear cache button to clear the cache files.
Windows / Linux / Max – In case if you are using a Desktop platform then it is recommended to use a special Kodi add-on named Indigo to clear the cache files.
You may also like: Simple guide to Install Turkvod Repo – Kodi Add-on


